Fresh Pasta Dough

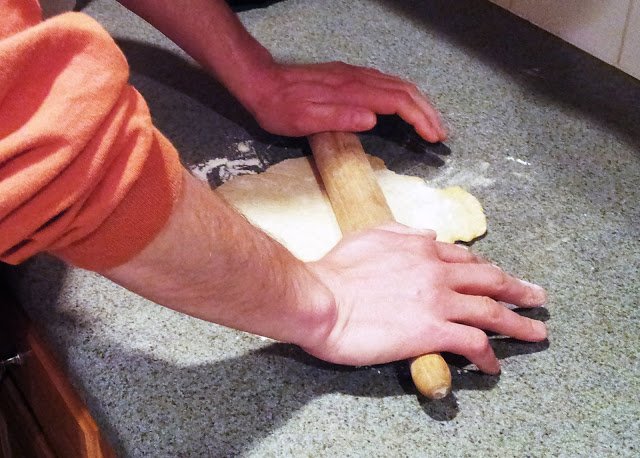
I’ve wanted to make fresh pasta for a long time. However, I was always intimidated by the thought of it and never knew what to do with it once I had it made. Well, for Christmas we got an Italian pasta cutter called a chitarra. It looks like a little harp and you lay the pasta sheets over the strings and then use a rolling pin to push it through the stings. One side makes a larger noodle, somewhere between spaghetti and linguine and the other side make a small noodle a little larger than angel hair.

So to start, there are tons of recipes online for homemade pasta dough. I read through many of them and they are all very similar – just slightly different amounts of flour, eggs, salt, olive oil and (sometimes) water. The one I settled on was from MangiaBenePasta.com and you can find various recipes from them at the link. I liked theirs the best because they give recipes for different quantities. The one I chose was for 3 to 4 servings. This made a manageable size of dough to work with for the first time. I did leave out the water from this recipe because some of the reviews on the chitarra state to use a denser pasta so it cuts easier.

INGREDIENTS

This recipe makes 3 to 4 servings (or two large man-sized servings)

  • 1 1/2 cups of flour (I used all purpose white flour)
  • 2 eggs
  • 1/2 teaspoon of salt
  • 3/4 teaspoon olive oil
  • 3/4 teaspoon luke-warm water

For a little bit larger amount of pasta, use this one for what they call 5 to 6 servings:

  • 2 1/4 cups of flour (I used all purpose white flour)
  • 3 eggs
  • 3/4 teaspoon of salt
  • 1 teaspoon olive oil
  • 1 teaspoon luke-warm water

Instructions

Pasta Dough Ingredients

Start by putting the flour in a mound on a clean dry space. I used our counter top but most recipes call for using a wood cutting board. Now, make a well in the middle of the flour. I started out using my fist but then the first egg took up the whole well so I had to enlarge it. Add the eggs, salt, water and olive oil to the middle of the well. Mix the eggs in the middle of the well with a fork and then slowly start incorporating the flour from the sides of the well. Eventually, you’ll run out of flour on the sides and by this time it is mixed enough to start using your hands to mix all the ingredients.

I was surprised that it was so dry at this point. I really started to think that I needed to add some water but I didn’t. I just kept mixing it with my hand and eventually it started to look like pasta dough. This just took a few minutes. At this point, start kneeding the dough to get it silky smooth. The recipe I used said you need to kneed for 10 minutes but I found that it took about 15 minutes of continuous kneeding to get it really smooth. I think this is something you get better at with more practice. I tried to follow the instructions I read online and really put my weight into it and the process seemed to go well.

Once it is kneeded to a smooth consistency and not sticky any more, you should roll it into a ball and let it rest. How long, you ask? Well, apparently, it all depends on who you ask! I followed their directions and covered it with a towel but I let it rest for an hour, rather than the 15 minutes they suggest. I also read that you can wrap it tightly in plastic wrap to let it rest. If this one doesn’t turn out good, I’ll try that method next time.

Pasta Dough Resting

Once the pasta has rested you need to roll it out. Most instructions say to get it to 1/16 inch. I am not sure I got mine that thin, but I just rolled and rolled and rolled until I felt it was enough.

Rolling the pasta dough

Here is a look at the final product. My dough is rolled out and ready to use. At this point, you can do anything you want with it. I am using my dough in the chitarra and will add that post later.

Rolled pasta

Advertisement

Pate Brisee

This recipe is for our Chicken Potpie in a pumpkin. Although, I have an idea that I can use it in many other recipes.

If you google this recipe, you’ll find many variation, and to be honest, we tweak ours every year just to keep it interesting. This year is the first time I actually made the pate brisee. We’ve always used frozen pie crust in the past and it works just fine. This year we forgot to pick it up from the grocery store so I decided to go for it since we have all the ingredients and it doesn’t look too hard. I made it last night and kept it in the refrigerator overnight.

The simple recipe for the covering is as follows:

INGREDIENTS

  • 2 1/2 cups all-purpose flour
  • 1 teaspoon salt
  • 1 cup (2 sticks) unsalted butter, cut into small pieces
  • 2 tablespoons thyme leaves
  • 1/4 cup to 1/2 cup ice water

To start, make sure all your ingredients are cold. I even read online that you should rinse your hands in cold water. Put the flour, salt and thyme leaves in the bowl of a food processor. Add the pieces of butter, pulse for approximately 10 seconds, or just until the mixture resembles coarse meal. Use the feed tube to add the ice water, drop by drop, until the dough just holds together without being wet or sticky; do not process more than 30 seconds. Test the dough at this point by squeezing a small amount together. If it is crumbly, add a bit more water. Divide the dough in half, and shape into 2 disks. Wrap in plastic film, and refrigerate to chill for at least 1 hour. I prepared mine last night and it was very good today. If you have any dough left over, wrap it in 2 layers of plastic wrap and save it in the freezer to use it later.

If you are going to use this for a pie crust, substitute the 1 teaspoon of salt for 1 teaspoon of white sugar and leave out the thyme leaves.