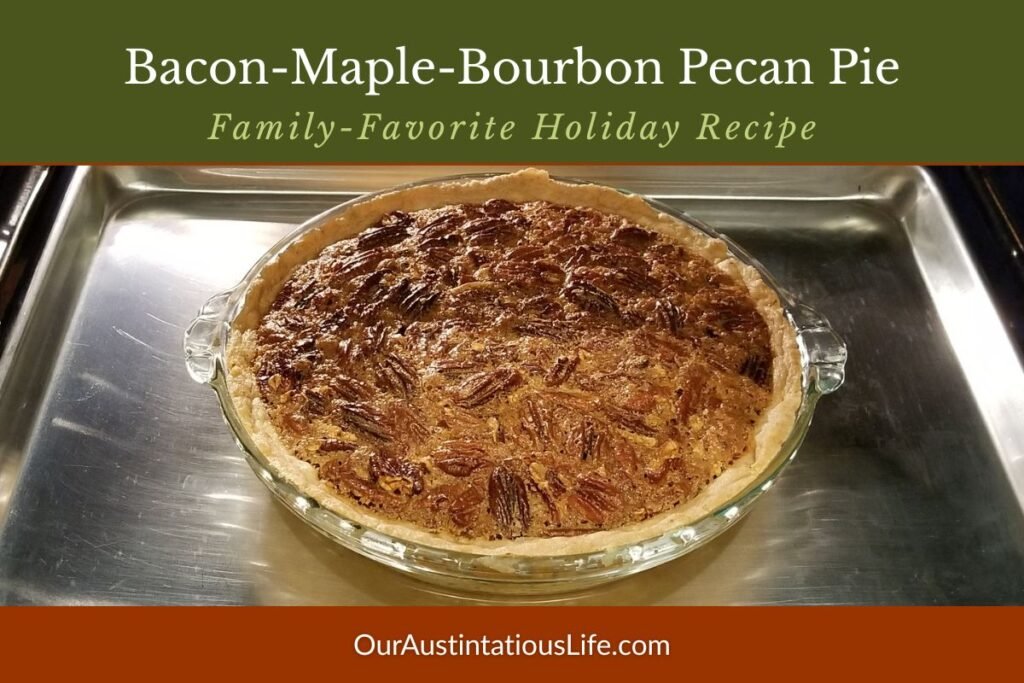
Bacon-Maple-Bourbon-Pecan Pie

Thanksgiving dinners and Christmas dinners deserve a grown-up dessert. That’s why we knew we had to try this recipe when we found it in the monthly newsletter that our realtors send to us. Of course, it wasn’t as fantastic as it could be so we modified it for some extra wow factor. The original recipe is for a Bacon-Maple-Walnut pie. The first thing we did was added the bourbon. We got this idea after watching a cooking show where bourbon was included in a couple different ways into desserts. The pie was great but we couldn’t help comparing it to a pecan pie, so we knew that was the next upgrade for this recipe. We are in Texas after all, so the pecan is always our nut of choice when it’s an option.

Since I mentioned them above and they’re the inspiration for this recipe, here’s the shout out to our realtors, Doug Jacobs & Jeff Mikeska, who sold us our house 18 years ago and still send us their newsletters and calendars. The newsletter they sent back in 2016 had this recipe in the holiday section. Of course, it caught our attention and we had to try it. I’ll also add that they’re great guys that we highly recommend them if you need a realtor in Austin.

Ingredients

Bacon – 4 ounces of thick cut bacon plus the bacon fat, separated

  • save 2 to 3 tablespoons of bacon fat for the crust dough
  • put the crumbled bacon in the pie


Ingredients for the Pie Crust

  • 2 to 3 tablespoons of bacon fat, from the 4 ounces of bacon (see above)
  • 5 tablespoons of vegetable shortening
  • 1 cup of all-purpose flour
  • 2 tablespoons of very cold water
  • 1/2 teaspoon of apple cider vinegar

Ingredients for the Filling

  • 3 large eggs
  • 1 cup of dark maple syrup (grade B or 2)
  • 1/2 cup granulated white sugar
  • 1/2 cup of packed dark brown sugar
  • 1 tablespoon of vanilla extract
  • 2 tablespoons of bourbon (go for the good stuff here!)
  • 4 ounces of bacon, crumbled into small pieces (see above)
  • 2 cups of pecans – crushed or halves

Instructions

Instructions for the Crust

NOTE: we usually don’t get as much bacon fat from the bacon used for this recipe as the original recipe calls for. Therefore, we usually use some bacon fat that we have left over from earlier. In case you’re wondering, yes, we have a little container like my Granny used to have where we collect bacon fat anytime we cook bacon. If you don’t have as much as the recipe calls for and you don’t have your own backup reserve, go ahead and substitute with additional shortening.

  1. Fry your bacon in a skillet on medium heat until the bacon is crisp (about 3 to 5 minutes). Transfer the fried bacon to a paper towel.
  2. Save 2 tablespoons of the bacon fat from the pan (you’ll put this into the filling), then measure the rest of the left over bacon fat and put it into a heat-safe measuring cup. Let the bacon fat cool for 10 minutes. Then add enough shortening so that you get a total volume of 6 tablespoons (this is also 1/4 cup plus 2 tablespoons).
  3. Pour flour into a bowl and add the bacon fat from the measuring cup, cutting it in with a fork until it resembles coarse cornmeal.
  4. Mix the 2 tablespoons of cold water and the vinegar and then add it to the flour mixture until it forms a soft, non-sticky dough. Form the dough into a ball, dust with flour and roll into an 11 inch circle. Place the dough in a pie plate.

If you want an easy method to roll out your pie dough, check out this method using a recycled plastic bag: How to roll out pie dough using a plastic bag or wax paper
Instructions for the Filling

Preheat oven to 350 degrees.

  1. Beat the eggs, maple syrup, sugars and vanilla extra into a bowl with an electric mixer at medium speed. Mix in the reserved 2 tablespoons of bacon fat.
  2. Crumble the bacon into small pieces and put the crumbled bacon into the bowl. Stir in the pecans until incorporated and pour into the pie crust.

Bake pie at 350 degrees for 55 minutes, until puffy and brown. There should only be a slight jiggle in the center of the pie when it’s finished cooking. Let pie cool before slicing.

Advertisement

Piselli e Guanciale – Peas and Bacon

Piselli e guanciale, otherwise known as peas and bacon.

Piselli e guanciale, otherwise known as peas and bacon.

This is another gem of a recipe that comes from my favorite cookbook, Breaking Bread in L’Aquila. We modified this one to substitute bacon and changed the cooking order so that the bacon and tomatoes stay firm.

One of the best parts of this recipe is that it is so simple. We can’t find fresh peas here in Austin, TX, so we always go with the frozen peas. As for the protein, we go with bacon. I mean, who doesn’t like bacon. I know guanciale isn’t the same as bacon but it’s the closest you can find here in Austin. We also found that adding the bacon at the end gives a crispier bacon which gives a nice texture since the rest of the dish is so soft.

We made this batch for a Sunday dinner with friends where we made pasta and mixed the piselli e guanciale with the pasta.

This should serve 6 – 8 people.

Ingredients

  • 2 to 3 tablespoons extra virgin olive oil
  • 4 ounces of bacon (or guanciale), chopped
  • 2 medium onions, chopped
  • 1 pound of peas, frozen or fresh
  • 2 medium tomatoes, chopped
  • Salt & fresh ground pepper, to taste

Instructions

Start by cooking the chopped bacon in a frying pan. Once it is fully cooked, remove the bacon but leave the oil in the pan. Add your chopped onion to the frying pan with the bacon grease. If you need extra liquid, add the olive oil. You only need the olive oil if you don’t have enough bacon grease to use for your sauted onions. Heat the frying pan with the bacon grease and olive oil over medium-high heat. Once it’s heated, add the onion and saute until the onion starts to turn translucent. This should take about 5 minutes.

Stir the peas into the sauted onions. Continue cooking for 5 to 7 minutes, or until the peas are warmed and still plump. Now, add the cooked chopped bacon and the tomatoes and mix together. Taste the dish and then season with salt and pepper, to taste.

Serve warm as a side dish. Alternatively, you can use this mixture as a topping for pasta as a main course.


Bacon Jam

Finished bacon jam

Finished bacon jam

This post is long over due. I thought I had shared one earlier this summer but it appears it was left in draft limbo land. The idea for this post came from a pizza we had at Cane Rosso here in Austin, TX. You might have seen this restaurant on the TV show “Diners, Drive-ins, and Dives” or written up in Austin or Dallas food blogs. It’s a great restaurant with fun pizzas. One of the ones we tried when we visited their Austin, TX, location was a bacon jam pizza. We had never heard of anything like this and immediately fell in love with the flavors. A quick Google search resulted in a lot more recipes than I expected.

We took a few of them and came up with a version that we really like. We use the jam to put on pizza but it’s got so much more potential that you can do anything you want with it.

Ingredients

  • 1 lb bacon, chopped
  • 2 tablespoons butter
  • 4 cups of yellow onion, diced
  • 1 teaspoon salt
  • 2 tablespoons minced garlic
  • 1/4 cup brown sugar
  • 1/4 cup apple cider vinegar
  • 1 teaspoon ground black pepper
  • 1 tablespoon of chopped hot pepper (we used a red jalapeno in the pictures)
  • 1/2 cup water
  • 2 teaspoons balsamic vinegar
  • 2 teaspoons extra-virgin olive oil

Direction

chopped bacon ready to be cooked

chopped bacon ready to be cooked

Place the bacon in a large pot and cook over medium until the bacon is crispy and rendered fat is foaming and white. It should take about 10 minutes. Pour bacon and rendered fat into a strainer placed over a bowl to collect the fat. Save the fat for the next step.

cooking bacon

cooking bacon

Return the pot to medium-low heat and add 2 tables spoons of bacon fat and 2 tablespoons of butter in the pot. Add the chopped onions and 1 teaspoon of salt and saute until the onions are soft and translucent. It should take about 10 minutes.

picture of ingredients

picture of ingredients

Onions sauteing

Onions sauteing

Add the garlic, brown sugar, apple cider vinegar, black pepper and cayenne to the onion mixture. Once mixed, add the cooked bacon and stir in the water. Cook until the jam is a reddish-brown brick color and has a jam consistency. This will take about 10 to 15 minutes.

Bacon mixed into onion mixture

Bacon mixed into onion mixture

Once you get the jam consistency, remove from heat and stir in the balsamic vinegar and olive oil. Stir the mixture until shiny and thoroughly mixed.

Final consistency of the jam

Final consistency of the jam

Finished bacon jam

Finished bacon jam

Bacon-Maple-Bourbon Walnut Pie

This twist on a classic pie comes from our realtor’s monthly magazine, American Lifestyle. We decided to add the bourbon to kick it up a notch. It’s the holiday season, so why not take it over the top! The bacon is really the cool element and it really adds an interesting flavor to this pie. In our recipe, we used a light maple syrup instead of the dark. I think the dark will be better but it did taste great. We also over chopped the walnuts and it probably would be better to have the larger pieces of a courser chop for some texture in the pie.

Bacon-Maple-Bourbon Walnut Pie

Bacon-Maple-Bourbon Walnut Pie

Ingredients

For the crust:

  • 4 ounces of thin-cut bacon slices
  • 5 tablespoons of solid vegetable shortening
  • 1 cup of all-purpose flour
  • 2 tablespoons of very cold water
  • 1/2 teaspoon of apple cider vinegar

For the filling:

  • 3 large eggs
  • 1 cup of dark maple syrup
  • 1/2 cup of granulated white sugar
  • 1/2 cup of packed dark brown sugar
  • 1 tablespoon of vanilla extract
  • 2 tablespoons bourbon
  • 2 cups of coarse chopped walnuts

Instructions

Preheat your over to 350 degrees.

First, make the crust. It’s a simple process similar to the patte brise, except you add BACON! Start by frying the bacon in a skillet on medium heat until they crisp. This should take about 3 to 4 minutes. Once crisp, transfer the cooked bacon slices to a paper towel. Now, save the bacon fat from the pan. Reserve 2 tablespoons of the bacon fat and then put the rest of the leftover bacon fat into a heat-safe measuring cup. Let it cool for 10 minutes and then add in enough shortening so the total volume is 6 tablespoons (1/4 cup plus 2 tablespoons).

Now that the bacon fat and shortening are ready, pour your flour into a bowl and add the fat from your measuring cup.  Cut this in with a pastry cutter or fork until it resembles coarse cornmeal.

Mix 2 tablespoons of cold water and the vinegar together and then add to the flour mixture until a soft, non-sticky dough forms. Form the dough into a ball, dust it with flour and roll into an 11 inch circle. Place a pie plate in the center and trim the edges.

Now that the pie dough is ready, start on your filling. Beat the eggs together with maple syrup, sugars and vanilla extract into a bowl with an electric mixer at medium speed. Mix in the reserved 2 tablespoons of bacon fat and the bourbon.

Crumble the bacon into small pieces in the bowl. Stir in the walnuts and then pour the filling into the pie crust.

Bake at 350 degrees for 55 minutes, until puffy and brown. There should only be a slight jiggle in the center. Let cool before slicing.

Armadillo Eggs

If you search out “Armadillo Eggs” you find an array of recipes. Some of them are what I consider jalapeno poppers, rather than Armadillo Eggs. Our version of Armadillo Eggs consists of chicken breast pieces inside a jalapeno and wrapped in bacon. A jalapeno popper would be cream cheese inside the jalapeno.

We decided these Armadillo Eggs would be our main meat course for dinner on Friday night so we used more chicken and less bacon than customary for these items. They are typically served as an appetizer so you aren’t expected to eat too many of them.

Ingredients

  • 9 large jalapeno peppers, halved and seeded
  • 2 1/2 large chicken breasts
  • 9 strips of bacon
  • 1 tbsp chili pepper

Directions

Cut the chicken breasts into 1 inch strips. Then, lay these inside the hallowed-out halves of the jalapenos.

Here is the chicken  strips placed inside the jalapeno halves.

Here is the chicken strips placed inside the jalapeno halves.

Using one bacon strip at a time, stretch it out and cut it in half. Lay each half length wise over one of the chicken filled jalapenos. We wrapped the ends under the jalapenos to help keep it in place. If your bacon isn’t long enough to do this, you can use toothpicks to hold the bacon on top.

Prepare an oven pan and heat the over to 425 F. We laid some foil on the bottom of the pan to make clean-up easier and put a small rack over the foil to keep the jalapenos elevated above the grease that gathers on the bottom.

Here are the Armadillo Eggs ready for the oven.

Here are the Armadillo Eggs ready for the oven.

Place the bacon covered jalapenos on the rack and then sprinkle with chili pepper. Now put the pan in your oven. Cook for 35 to 40 minutes, or until the bacon is crispy.

Armadillo Eggs right out of the oven.

Finished Armadillo Eggs